
Raita Recipe – A Refreshing Side Dish for Every Meal
Are you looking for an easy and delicious raita recipe that you can make in no time? Homemade raita is a delicious side dish that is a fantastic accompaniment to Indian meals. It is made with fresh yogurt and a wonderful mixture of spices that is a must try for food lovers. Whether you are making a full course meal or just looking for something cooling, this raita recipe is the easiest way to make your meal special. Continue reading the step-by-step instructions, pro tips and FAQs on raita.
Table of Contents:
- What is Raita?
- Ingredients Required for Raita Recipe
- Step-by-Step Guide to Making Raita
- Quick & Easy Way to Make Raita
- Pro Tips for the Best Raita Recipe
- How to Make Raita Without a Mold?
- Easy Raita Recipe Variations
- FAQs about Raita Recipe
What Exactly is Raita?
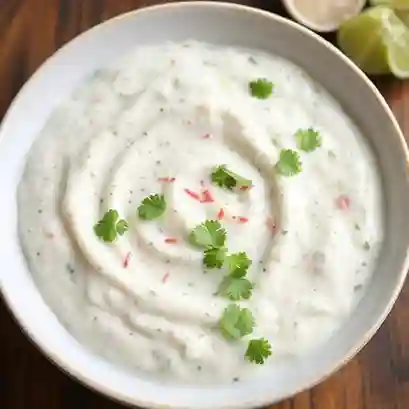
Raita is a classic Indian accompaniment made with thick yogurt, vegetables, and some of the warm spices. Raita is served chilled, and is a mitigating agent for spicy foods like biryani, pulao, or kebabs. Easy raita is part of everyday Indian cooking and is famous for its cooling effect and taste, its also very digestable!
Quick & Easy Way to Make Raita
- If you’ve got no time, here’s a super simple version:
- In a bowl, take fresh yogurt and whisk until smooth.
- Mix in salt, cumin powder, black salt, and chaat masala (optional).
- Then, add in the finely chopped cucumber and coriander leaves.
- Mix the raita and serve right away with your meal!
Raita Recipe Pro Tips:
✅ For the perfect consistency, use thick, fresh yogurt.
✅ Make sure to whisk the yogurt well before serving to remove any lumps.
✅ Roasting the cumin prior to adding develops the flavor.
✅ For an extra sweetness, add a bit of sugar and fresh pomegranate seeds.
✅ If you want a richer texture, feel free to use Greek yogurt.
✅ Serve raita cold to keep it refreshing.
Making Raita Without a Mold:
You don’t have to fulfill into the myth that you need specific molds or a special process to make raita. Raita is simply yogurt whisked with spices and combined with your favorite vegetables or herbs, or even both. If you want your raita to be more visually pleasing, you may form it with a spoon or small bowl before serving.
Raita Recipe Variations:
- Boondi Raita – Add crispy boondi (fried chickpea balls) to the yogurt mixture.
- Pomegranate Raita – Add pomegranate seeds for a sweet and tart raita.
- Mint Raita – Blend the yogurt with mint and green chilies!
- Cucumber Raita – Simply combine yogurt and cucumber.
- Fruit Raita -Combine your chosen seasonal fruits (e.g., apple, banana, and grapes) in sweet raita.
Raita Recipe
Description
Are you looking for an easy and delicious raita recipe that you can make in no time? Homemade raita is a delicious side dish that is a fantastic accompaniment to Indian meals. It is made with fresh yogurt and a wonderful mixture of spices that is a must try for food lovers. Whether you are making a full course meal or just looking for something cooling, this raita recipe is the easiest way to make your meal special. Continue reading the step-by-step instructions, pro tips and FAQs on raita.
Ingredient
Basic Ingredients:
Vegetable Add-ons (Choose as per your preference):
Instructions
-
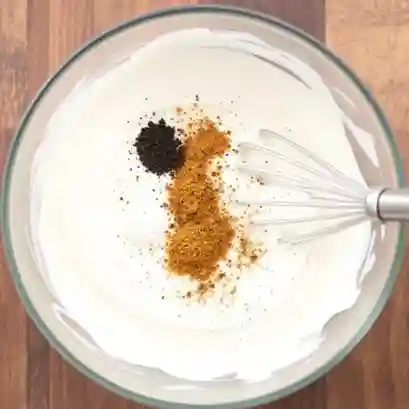
Step 1: Prepare the Yogurt Base
- Yogurt Base PreparationIn a mixing bowl, take 2 cups of any fresh yogurt.
- Whisk the yogurt until it is smooth and creamy.
- Add salt, roasted cumin powder, black salt, black pepper, and chaat masala.
-
Step 2: Add Vegetables
- Add Vegetables: Finely chop all the vegetables of your choice and add them to the yogurt.
- Stir everything well to distribute it evenly.

-
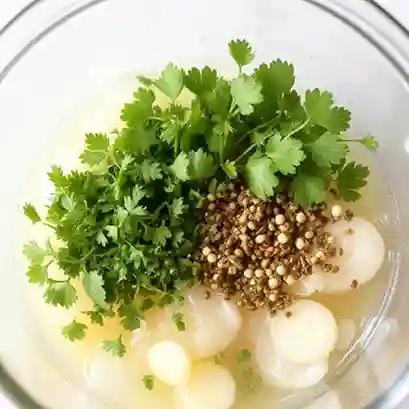
Step 3: Add Fresh Herbs & Enhancers
- Add Fresh Herbs & Enhancers Add finely chopped coriander leaves and mint leaves for freshness.
- And squeeze a teaspoon of lemon juice for tangy flavor.
-
Step 4: Chill & Serve
- Chill & ServeLet the raita rest in your refrigerator for 15-20 minutes.Serve with cold biryani, paratha, or alongside a meal.
Note
This simple raita recipe is a wonderful accompaniment to any meal, packed with incredible flavor and freshness. As there are infinite variations, you can always add or swap out ingredients to fit your palate. You can make a simple cucumber raita or throw in other ingredients, either way, a homemade raita recipe is always welcomed. Try one…it's delicious! And look out for other recipes and tips!